Using Sophos Bootable Anti-Virus on Linux
Sophos Bootable Anti-Virus was retired in August 2022.
We will leave this documentation up in case folks find it useful.
We will leave this documentation up in case folks find it useful.
Background
We can use Sophos Bootable Anti-Virus (SBAV) for off-line scans of our machines. However, in its default mode, SBAV doesn’t automatically mount our linux machines’ drives even though the software does have the ability to scan them. This shows how we mount the drives manually.
Our approach
Definitely start with a backed up test machine until you’ve verified that the process works for you. We borked our first machine trying to figure this out, and it had to be restored from backups.
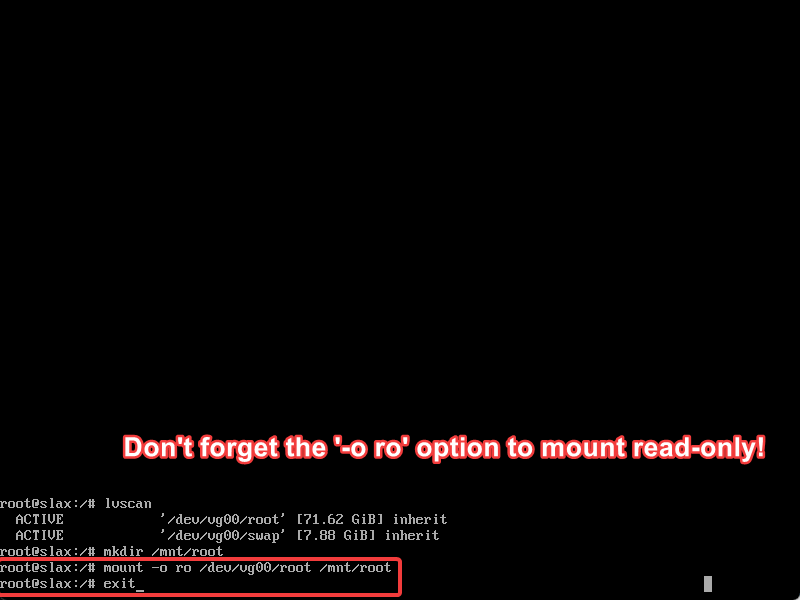
Be sure to mount your volumes as read-only!
Be sure to mount your volumes as read-only!
- From the SBAV main menu, choose Bash Shell (advanced users only)

- Once in the shell, it’s time to hunt for the machine’s volumes. You’re likely going to know how to do this for your systems. Ours generally use LVM, so using the
lvscantool was helpful for us in finding the underlying storage devices.
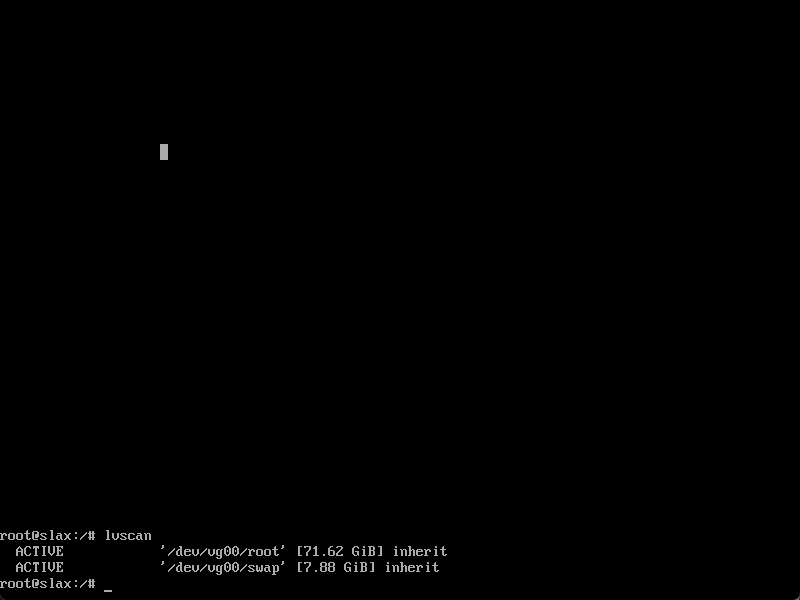 In this example, we have volumes at
 /dev/vg00/root and dev/vg00/swap.
- Create mountpoint directories for your volumes, if you have more than one, or even if you simply prefer to.
 In this example, we created the
 /mnt/root mountpoint.
- Mount your drives read-only to your mountpoints. You must mount them read-only, or they are likely to be break and not be easily recovered.. We used the commands
mount -o ro /dev/vg00/root /mnt/rootto mount our machine’s storage devices. Runexitto return to the SBAV menu.
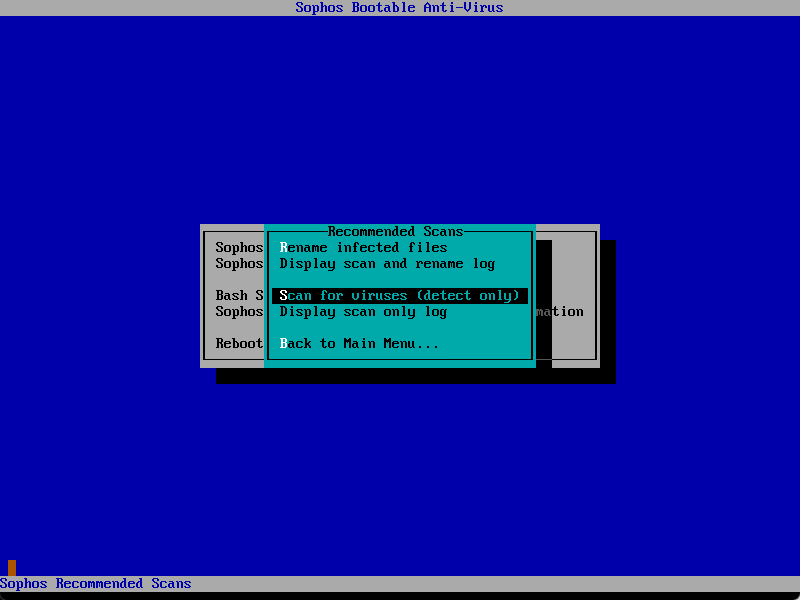
- Run your scans. For linux machines, we use Sophos Recommended Scans -> Scan for viruses (detect-only) since it can’t really remediate anything on the drives themselves. I’m not sure any other option makes sense.
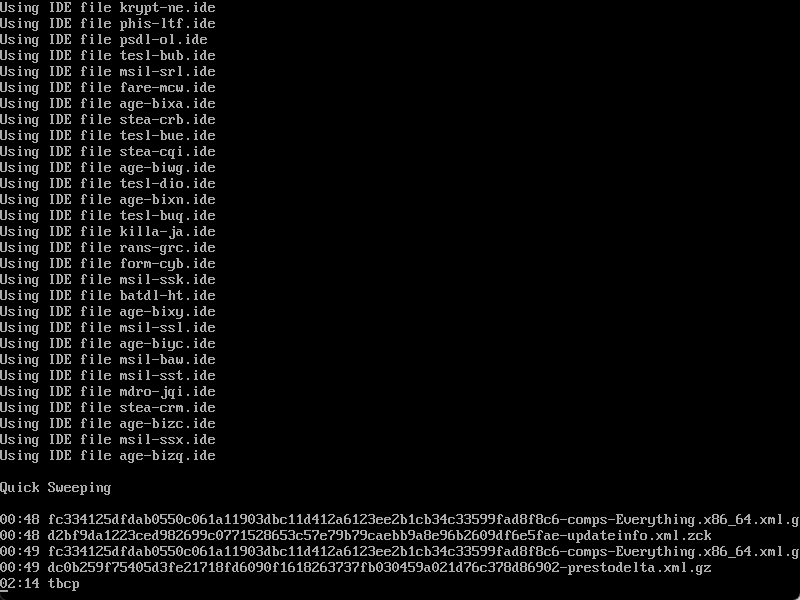 *Scan running. Our scans run pretty quickly, about 3GB/minute on this user’s CentOS 7 virtual machine with xfs filesystem.**
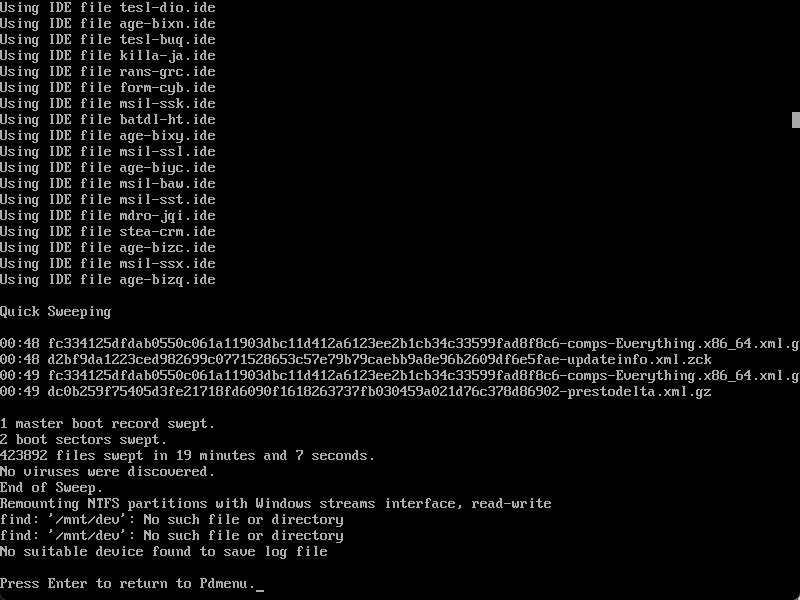 Scan complete.
- After your scan completes, remove/eject your SBAV media and reboot.
And in case you were worried that the scan wasn’t actually doing anything, we placed the EICAR file in a test user’s home directory, and it was successfully detected by SBAV:
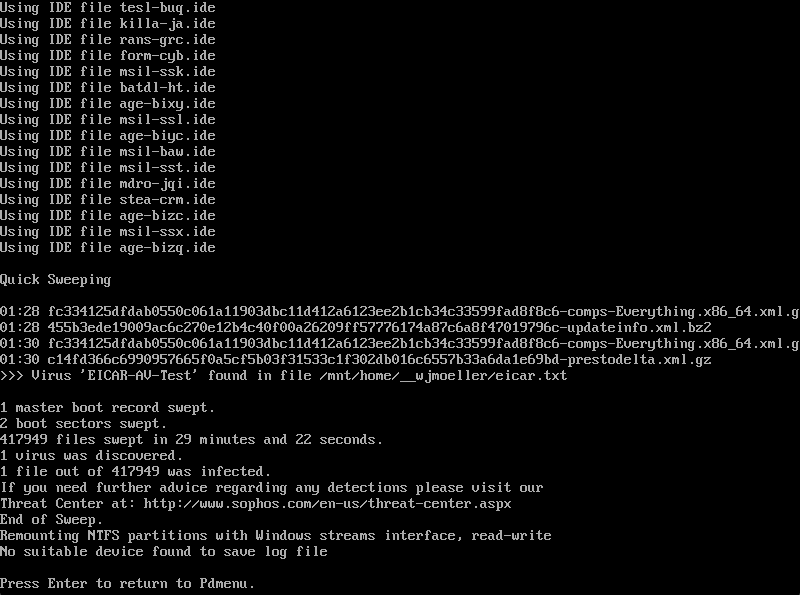 EICAR test file found.